
If you wish to send personalized messages to a large number of people at once without letting them know who else is receiving this message, you would want to make use of the Mail Merge feature. Mail Merge is an excellent way to make your bulk messages look more personal, send different recipients their own information such as Logon name and password, or send our Greeting cards.
As there are various ways to a mail merger, similarly there are different tools available to make the process simpler or include additional options. In this post, you will be guided by various ways to carry out your own mail merge.
NOTE: While mail merge can be done to a document or a printer, here we have used email as the output. The process for the other outputs (document and printer) somehow is similar to the instructions provided here.
How to Use Mail Merge for Automatically Generating and Sending Personalized Emails
If all the recipients that you want to include in Mail Merge are already in the Contacts folder of Outlook, using Mail Merge from within Outlook is the best method. In this Mail Merge example, an email will be sent to a particular set of contacts for verifying whether their contact information is correct or not.
NOTE: Before proceeding with the steps, make sure to confirm with your ISP or mail admin if there are any limits set for the number of emails that can be sent in an hour or in a day. Make sure to send emails according to the restriction.
1.) Open the Contacts folder to select the contacts to whom you wish to send an email. You can press CTRL+3 to get to the Contacts folders.
2.) Select the contacts from the list or apply a filter to view only those contacts which you wish to add to the recipients’ list. You can do this by using the search option or sorting contact category-wise.
3.) Next, open the Mail Merge option in your Outlook program.
- If you are using Outlook 2007, go to Tools > Mail Merge.
- If you are using Outlook 2010, Outlook 2013, or Outlook 2016, go to Home > Option Group: Action > Mail Merge.
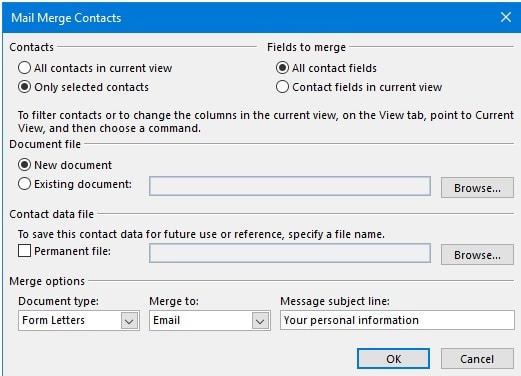
4.) Make sure that you have selected the correct option for contacts.
- If you have filtered your view, select “All contacts in current view”.
- In case you selected the contacts manually, select the “Only selected contacts” option.
5.) Then, go to the bottom section of the dialog box and set the “Merge Options” to
- Document Type: Form Letters
- Merge to: Email
- Message subject line: Enter the title of the subject as per your preference. You can modify this later as well.
The Mail Merge Contacts screen of your Outlook will look something like this
6.) After making the desired changes, click on the OK button and wait for the Word to start.
7.) A new Word document will appear on your screen. From the Ribbon, you will need to select the Mailings tab.

8.) Now, you will need to write your message with variables.
- Enter the greeting line by pressing the Greeting Line
- After selecting the desired greeting line, make sure to select which greeting line to use when there is no proper information available from the contact information.
- Make sure to enter a space at the end of the word in order to prevent it from sticking to the addressee’s name.
- When done, click on the OK button to close the dialog box. Then hit Enter key on your keyboard to start a new line in the document.
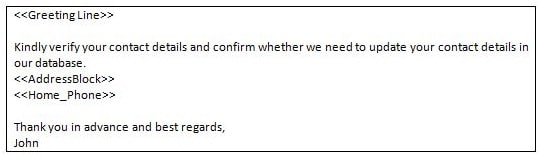
- Then, you can add a message such as “Kindly verify your contact details and confirm whether we need to update your contact details in our database.”
- Then, press the Enter key on your keyboard to begin a new line and add an address by clicking the Address Block
- As the address of the person has already been added, their name can be removed from the address block by deactivating the “Insert recipient’s name in this format” option.
NOTE: As only individuals have been addressed in this example, make sure to disable the “Insert company name” option.
- Then, click on the OK button to close the dialog box and press the Enter key on your keyboard.
- In the next line, you will need to add the home telephone number by selecting the “Insert Merge Field” option.
- Select Home_Phone from the dialog box that appears on your screen and click on the Insert
- Close the Dialog box and press Enter to start a new line.
- Type a closing message such as “Thank you in advance and best regards, <your name here>”.
Your document should appear something like this-
9.) Make sure to preview the results by pressing the “Preview Results” button before sending the message. Moreover, you can choose from the arrow buttons in the toolbar to browse through different personalized emails.
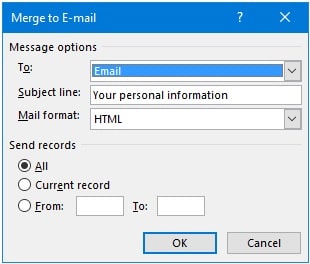
10.) After previewing, you can send the message by clicking on the Finish & Merge button and selecting “Send E-mail Messages…”. This will open a new dialog box on your screen. As you have already set up the subject and selected all correct contacts, you will not need to make any changes in this dialog box. You can simply click on the OK button to complete the Mail Merge process.
Mail Merge from Word with Outlook as Source
Instead of starting from Outlook, you can also start Mail Merge from Word as well. The difference in both methods is the dialog box that you use to choose the correct contacts.
Follow the same steps as mentioned above to select the contacts you wish to send the email to. After that, you can follow these steps to Mail Merge from Word with Outlook as a source.
1.) Launch the Mail Merge Wizard.
For this, go to the Mailings tab and click on the Start Mail Merge button and then on the Step by Step Mail Merge Wizard.
2.) This will open the Task Pane panel on the right side of the document from where you will need to select the document type as E-mail messages.
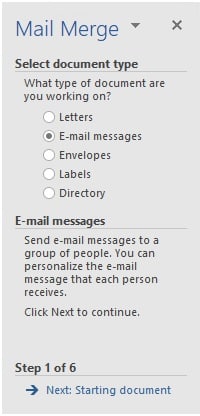
3.) After selecting the E-mail messages option, click on the Next option to get to the next step where you will be prompted to select the document to start from. As you will be entering your own contents, so simply click on the Next button.
4.) As Outlook will be used as the source here, so click on the option – “Select from Outlook contacts”.
5.) From the multiple Contacts folder in Outlook, you will need to select the actual folder which you will be using by clicking on the option – “Choose Contacts Folder”.
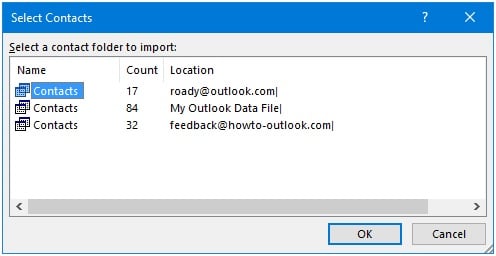
6.) Once you have selected the right Contact folder, you might be provided with the “Choose Profile” dialog box. Select the relevant profile (if any) or you can set it to the default selection and click on the OK button.
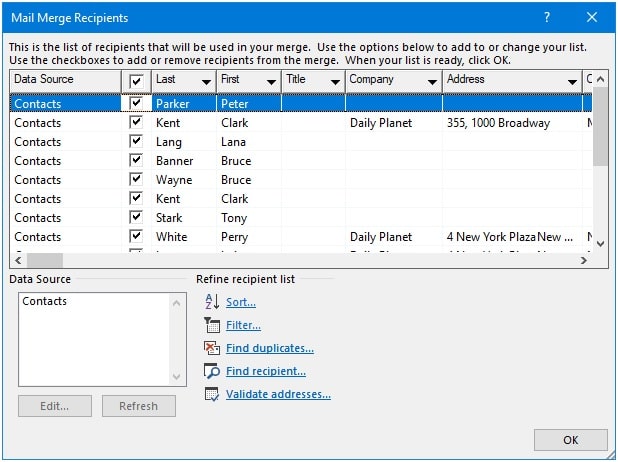
7.) Now, Word will open the “Mail Merge Recipients” dialog box where you will need to mention the contacts to which you wish to send an email.
NOTE: This dialog box comprises different selection and filter options which may make it a bit slow, especially if you have a lot of contacts. This is generally because the dialog box gets refreshed almost every time you make any changes to it. Moreover, you can use the “Find duplicates…” feature if you wish to use the whole Contacts folder for Mail Merge.
8.) Once you are done selecting the recipients, you will need to write the message you wish to send. Here you will need to enter the message in the same manner as you did earlier in the previous example. You can find the required variables already in the Mail Merge Wizard that you may want to use.
9.) After this step, you will be able to preview all the emails that you will be sending.
10.) Once you have reviewed everything thoroughly, click on the OK button to start sending the emails.
Mail Merge from Word with another source
If you are looking to send a personal email via Outlook but the information is in programs or documents other than Outlook, such as in Excell, Access, SQL query, a CSV file, etc. In such a case, you can use Mail Merge from MS Word too. Here is the process to do so.
1.) As the process is quite similar to the Mail merge from Word with Outlook as the source, you will need to follow the same steps mentioned in the previous example until you reach Step 3 in the Mail Merge Wizard.
2.) In this step, select the option “Use an existing list” and click on the Browse button. Select the document from the location. You can choose Excel sheets, Access Databases, Text Documents, Database Queries, and other sources that can work with MS Word.
NOTE: You may need to put the file in the delimiters depending on the type of file you select.
3.) Once you are done selecting the file and filtering your Contacts to address, go to Step 4. Here you will need to match the fields from your source to Mail Merge fields in order to use the already defined sections such as “Greeting Line”.
This means that if you have an Excel sheet that includes the Name, Email Address, Usernames, and Passwords section, you would wish to match the relevant fields to merge fields. For this-
- Click on the Match Fields button.
- This will open a dialog box with standard Merge Fields in your MS Word.
- Simply expand the drop-down list located next to the Last Name and configure it to the column in your source document comprising the required information.
- Match up the other fields if required and click on the OK to close the dialog box.
4.) Then, you can continue with the Mail Merge process as mentioned in the previous example.
5.) Once you reach the dialog box to send the emails, make sure to set the “To:” field to the column which contains the list of email addresses.
So, these are the ways to use Mail Merge for Automatically Generating and Sending Personalized Emails to the recipients.